Autodesk Maya, Unity, VR, Playmaker, Blender, After Effects and V-ray for Maya tutorials, tips and tricks
Search Maya Zest
Friday, July 19, 2013
Slide a vertex along an edge in Maya
Simple unless you don't know how to do it :). Select the vertex, hold the "c" key on the keyboard. Then middle mouse button click and drag on the edge close to it that you want to slide it along.
Please check "HELPFUL" below if it was, if not COMMENT below and tell me why! Don't miss another tutorial or tip! Subscribe to Maya Zest
Tuesday, July 9, 2013
How to make volumetric lights and fog in V-ray for Maya (God rays)
This is not that hard to accomplish but no one ever writes tutorials on it! How frustrating... here is how to do it.
NOTE: The fog effect will be affected by the scale of your scene so probably best to work in real world scale. This tutorial was done at a relatively small scale so you may need to adjust your numbers some from my values.
First set up the scene for you shafts of light. In this case we are going to make a window with sunlight flowing in the window.
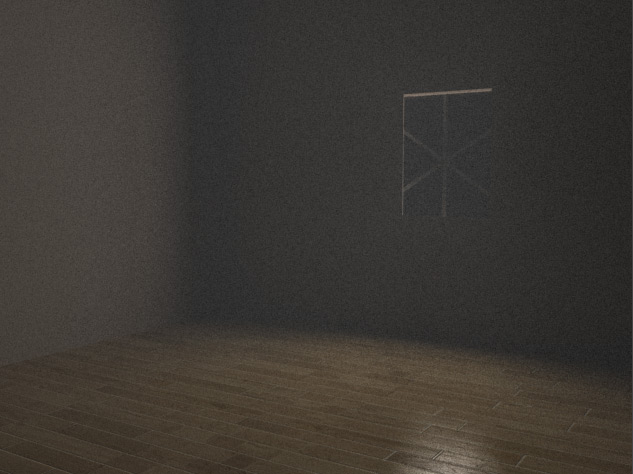
I've created a simple hollow box with a
cut out in the wall for the window.
Create an area light top create
menu>lights>v-ray rect light. and position it in your window
to give you some soft ambient light filtering int other room.
Now in your V-ray render settings.
Indirect illumination tab let's turn on GI.
Now create a normal spot light creat
menu>lights>spot light.
Position your spot light so that it
some distance away from your window and focused in on it.
Narrow the angle on the light so that it's literally spotted
right on the window.If it helps you can select the light in
the outliner and then in your viewport Panels>Look
through select to aim it
right in line wit the opening. Make
sure to turn on "Use Raytrace Shadows" in your spot
lights settings.
You should have something like this we can see the spot light gently hitting the floor.
Now let's turn on volumetrics. Goto
your V-ray render settings. v-ray Tab. Then to the
Environment sub drop down. Turn on "Use environment volume"
checkbox. An press the checkerboard box to load it.
The create render node screen comes up.
Type "fog" in the quick search box at the top option to
select Vray Environment.
Now press the arrow next to the
Environment Shader to see the settings for your fog effect. Let's do
a test render.
At the default settings the scene may
be very dark or even render black. This is because of how
thick the fog is.
Now you could turn the fog density
down, but then you will lose your "shafts effect" so
let's instead turn the lights up.
First turn your area light at the
window up to 3.
Now let's turn our spot light up to
300.
And now we finally have shafts
beginning to show up. Everything is pixeled though so go back
to your fog settings.
Render settings>V-ray
Tab>environmental drop down. Press the right arrow. And turn up the Subdive
setting on your fog to 32. Then turn the Shadows rays up on
your area light and spotlight to 24. To smooth things out.
This should give you a good starting
place for creating volumetric light effects on your own.
Here is a great
reference for the other fog settings.
http://www.spot3d.com/vray/help/150SP1/examples_vrayenvironmentfog.htm
To get even more realism in your Fog you can play with the Scatter GI properties in your fog attributes. Set it from 50-200 to see the effect of the GI bouncing around in the Fog.
The final render is looking much better. Now go make some sweet volumetric scenes with V-ray for maya!!
Please check "HELPFUL" below if it was, if not COMMENT below and tell me why! Don't miss another tutorial or tip! Subscribe to Maya Zest
Thursday, July 4, 2013
How to Add Blend Shapes inbetween blendshapes (Maya)
This process seems a little clumsy but once you understand how to do it it's very simple. NOTE that it's important what order you select these models in so pay attention.
First created your base object duplicate it and create your end goal blendshape version
Select your base model (in my case the
open book) hold shift and select
your TARGET blendshape. (the closed
book)
Go to the top "Window" menu then
submenus Animation Editors>Blendshapes
The blendshape window appears. Go to
"Edit" menu in the top of it then "create blendshape"
A new blendshape1 node appears in your
Blend shape editor. With a slider from 0.000 - 1.00
Test it out and you will see your
blendshape (open book) is working in your TARGET model (closed book). The closed book
opens. However at the midpoint .5 in the slider the blend doesn't look very
good. Let's fix that.
In your TARGET model (closed book) with
the blendshape node take the slider to .5 (or whatever point at which you
want to create the transition blendshape) Duplicate the TARGET model
at this point.
Make your changes to the new model.
Reset your TARGET model back to 0 on
the slider just to be safe. Then select
your new inbetween blendshape model
hold shift and select original TARGET
model as well. (closed book)
Now go to the Animation menu set top
left>Edit deformers>Blendshape>add> press the little settings box next to
add.
This brings up the Add blend shapes
Target options screen.
At the top you can specify which
blendshape slider you are adding this
inebtween to. In my case blendshape1.
Change that if you need to. Check
mark "Add in between target"
Set the inetbween weight to .5 (or whatever
spot you want the blendshape to effect
the slider.
Now for the Target index. Here is an
explanation of that value.
If the blend shape deformer blends
target object shapes in parallel (the
In-Between creation option was off when
you created the blend shape
deformer), you can add the new target
object shapes so that they work in
series with one of the existing target
object shapes. One quick way you can
identify the appropriate value for
Target Index is by looking at the order
of the target sliders in the Blend
Shape Editor (Window > Animation Editors
> Blend Shape). Note that in the
editor, each target object shape has its
own target slider. In the editor, going
from left to right, the Target
Index value for the left-most target
slider would be 1, the next 2, and so
on.
If the blend shape deformer blends
target object shapes in series (the In-
Between creation option was on when you
created the blend shape deformer),
Target Index can only be 1 because
there is only one target slider. In this
case, you don’t have to specify
Target Index, but you do need to specify
the In-Between Weight.
Based on this explaination you may or may not need a
Target index number. In my case I
just needed an inbetween weight. Once
your settings are in. Hit apply and
close.
Now your Target (Closed book) will have a slider that goes from the base blendshape to the target blendshape and use the new blendshape in the middle.
Please check "HELPFUL" below if it was, if not COMMENT below and tell me why! Don't miss another tutorial or tip! Subscribe to Maya Zest
Wednesday, May 8, 2013
Fix dark or black edge alpha Matte when compositing V-ray renders.
3D Object with alpha channel texture
3D Render
At the time of this writing there isn't a way to fix this in V-ray for Maya, but you can do a quick fix in After Effects at the compositing stage with the "Remove Color Matting" effect. Just apply this to your 3D render layer and you are good to go!
NOTE: If you STILL have a black fuzzy edge after applying this effect it probably means that After effects is also premultiplying and you need to RIGHT click the file you are compositing in after effects project list. A menu pops up. Go to Interpret Footage>Main In the alpha setting near the top set Alpha to STRAIGHT - UNMATTED. That should fix the problem!
Please check "HELPFUL" below if it was, if not COMMENT below and tell me why! Don't miss another tutorial or tip! Subscribe to Maya Zest
Subscribe to:
Posts (Atom)