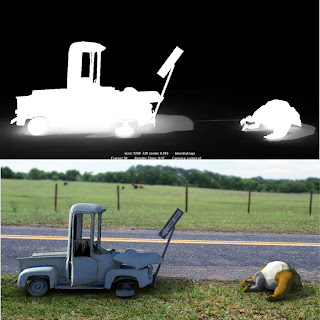
Casting shadows from Physical Sun on a surface that has a Use Background shader
Issue:
When you apply a Use Background shader to a surface, the Physical Sun does not cast shadows on the surface.
Solution:
To cast the shadows, please do the following:
1. First in render settings go to the indirect lighting tab, then select "create" next to physical sun and sky. This will create the physical sun lighting setup, which will look great but it won't cast any shadows on any use background shader objects.
2. Assign the Use Background shader to your surfaces.
3. In the Attribute Editor for the Use Background shader, turn off reflection.
Create a new Directional Light. You won't get the shadows with the default sky sun light. Put the new Directional Light above the original sun light and match the rotation of the original sun light.
In the Attribute Editor for the new Directional Light, set the intensity to .3 and turn on ray traced shadows.
4. Duplicate the new Directional Light, set its intensity to -.3, and turn off ray trace shadows.
The two directional lights cancel each other out, so that the default sun light controls the amount of light in the scene
5. Now select your camera in the outliner. In your viewport>Panels>panel>outliner.
6. In the attribute editor (accessible on the top right of the screen. three tiny icons it is the left most) Once your camera is selected you will see several tabs in the atribute editor on the right. choose mia_physical sky. Down near the bottom is a "use background, checkbox, clikc this box then hit the checkorboard button to the right. This will allow you to pick a material to use for the background. Select "surface shader" from the list of standar maya shaders.
7. Select a TGA for your Render and you are done! You have a alpha channel that captures the shadow being cast on the use background shader!
Please hit "helpful" below if it was!


